Do you have a website that targets only a specific region or country?
Have you noticed that your website is getting too many visits and most of them are from areas that you’re not targeting?
You can easily restrict or allow the access for those areas using .htaccess file, giving them instead a nicely customized 403 page.
This article includes two parts:
- Learning how to Allow or Restrict the access using .htaccess file.
- Customizing the 403 page in cPanel.
Before you start you will need the following:
- Access to cPanel;
Or
- FTP Access;
Part 1. Allow / Restrict the access.
1) Open your .htaccess file
.htaccess file is located in your public_html directory. You can open it up using File Manager in your cPanel or by connecting to your account via FTP Client (FileZilla, for example). The following tutorials describe both methods in detail:
https://www.hostinger.com/tutorials/htaccess/how-to-locate-htaccess-file-on-cpanel-file-manager
https://www.hostinger.com/tutorials/website/how-to-upload-your-website
2) Generate a list of IP addresses that you want to block
You can generate a list of IP addresses from a specific country here.
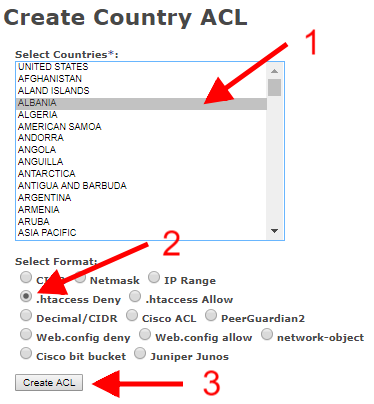
- Select a country that you want to either block or allow.
- You can select a list that would be ready to copy and paste directly to .htaccess file.
- Click Create ACL.
3) Copy the generated list and paste it into .htaccess file
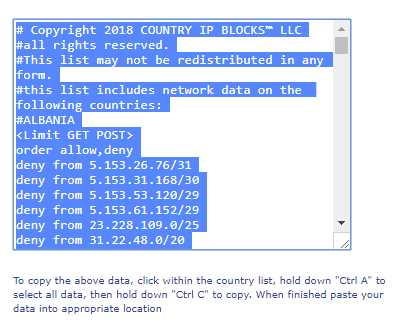
As it is suggested on the website – to copy the above data, click within the country list, hold down CTRL+A (MAC users Command+A) to select all data, then hold down CTRL+C (MAC users Command+C) to copy. When finished paste your data into your .htaccess file using CTRL+V(MAC users Command+V).
Part 2. Customize your 403 page in cPanel
This part will guide you on how to customize your 403 page in order to provide a nice user experience even for the users that you’re not targeting.
You will achieve the following:
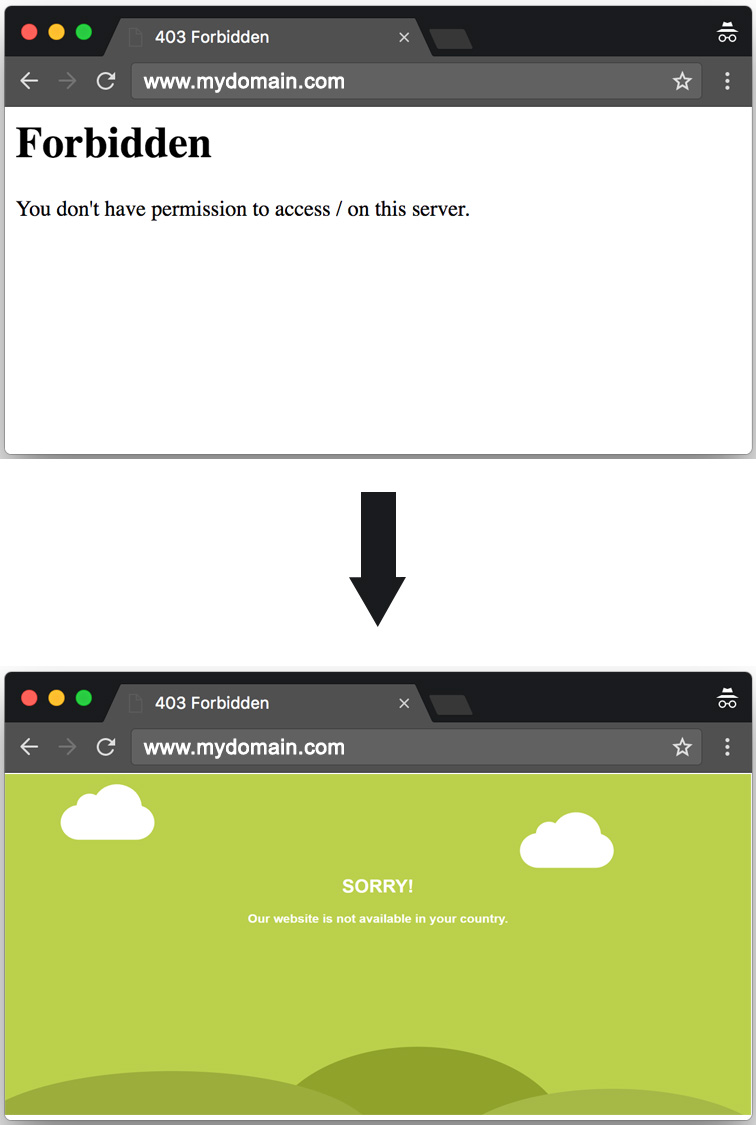
Let’s dive in!
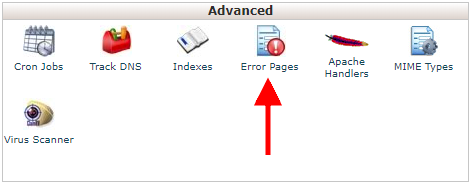
1) Open cPanel and find “Error Pages” option, click on it.
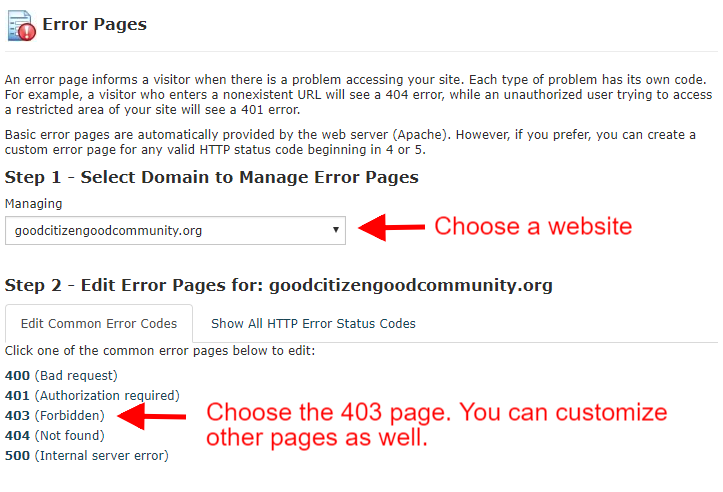
2) Choose a domain and the Error Page you want to customize.
- Step 1. Select a domain name from the drop-down list.
- Step 2. Select the page you want to customize, in our case, we will choose 403 (Forbidden) page.
Note: You can customize any Error Page that you want in the same way.
3) Paste your code and use the available tags if needed.
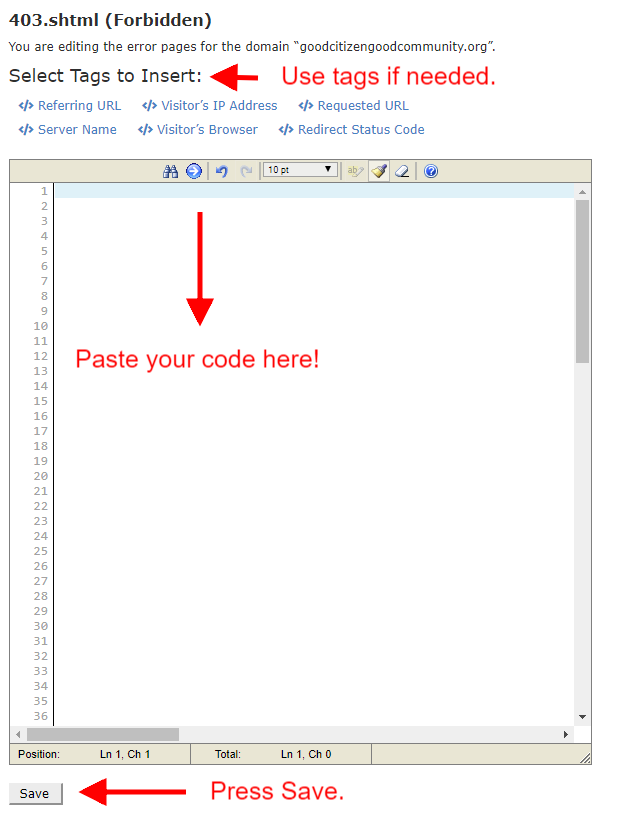
Get the code here
<!DOCTYPE html>
<html>
<head>
<meta name=”viewport” content=”width=device-width, initial-scale=1″>
<style type=”text/css”>
html {
background-color: #c2d44e;
-webkit-background-size: cover;
-moz-background-size: cover;
-o-background-size: cover;
background-size: cover;
}
.content{
text-align: center;
font-family: arial;
color: #fff;
margin-top: 15%;
}
h1{
font-size: 3em;
}
h4{
font-size: 2em;
}
.Ellipse_1 {
border-radius: 50%;
background-color: rgb(164, 180, 61);
width: 1053px;
height: 376px;
z-index: 2;
position: fixed;
top: 86%;
left: -5%;
}
.Ellipse_2 {
border-radius: 50%;
background-color: rgb(153, 170, 40);
width: 780px;
height: 522px;
z-index: 1;
position: fixed;
left: 35%;
top: 79%
}
.Ellipse_3 {
border-radius: 50%;
background-color: rgb(174, 190, 74);
width: 861px;
height: 376px;
z-index: 1;
position: fixed;
top: 91%;
left: 59%;
}
.clouds {
width: 200x;
height: 300px;
position: absolute;
}
.cloud1 {
top: -4%;
z-index: 100;
fill: #fff;
}
.cloud2 {
top: 4%;
z-index: 200;
left: 62%;
fill: #fff;
}
/*Media Queries*/
@media screen and (max-width: 1024px) {
.Ellipse_1, .Ellipse_2,.Ellipse_3,.cloud1,.cloud2{
display: none;
}
}
</style>
</head>
<body>
<div class=”content”>
<h1>SORRY!</h1>
<h4>Our website is not available in your country.</h4>
</div>
<div class=”Ellipse_1″></div>
<div class=”Ellipse_2″></div>
<div class=”Ellipse_3″></div>
<svg class=”clouds cloud1″ xmlns=”http://www.w3.org/2000/svg” xmlns:xlink=”http://www.w3.org/1999/xlink” version=”1.1″ x=”0″ y=”0″ width=”512″ height=”512″ viewBox=”0 0 512 512″ enable-background=”new 0 0 512 512″ xml:space=”preserve”>
<path id=”cloud-icon” d=”M406.1 227.63c-8.23-103.65-144.71-137.8-200.49-49.05 -36.18-20.46-82.33 3.61-85.22 45.9C80.73 229.34 50 263.12 50 304.1c0 44.32 35.93 80.25 80.25 80.25h251.51c44.32 0 80.25-35.93 80.25-80.25C462 268.28 438.52 237.94 406.1 227.63z”/>
</svg>
<svg class=”clouds cloud2″ xmlns=”http://www.w3.org/2000/svg” xmlns:xlink=”http://www.w3.org/1999/xlink” version=”1.1″ x=”0″ y=”0″ width=”512″ height=”512″ viewBox=”0 0 512 512″ enable-background=”new 0 0 512 512″ xml:space=”preserve”>
<path id=”cloud-icon” d=”M406.1 227.63c-8.23-103.65-144.71-137.8-200.49-49.05 -36.18-20.46-82.33 3.61-85.22 45.9C80.73 229.34 50 263.12 50 304.1c0 44.32 35.93 80.25 80.25 80.25h251.51c44.32 0 80.25-35.93 80.25-80.25C462 268.28 438.52 237.94 406.1 227.63z”/>
</svg>
</body>
</html>
Conclusion
You have learned how easy is to block or allow a specific country/area from accessing your website using an .htaccess file and how to customize your 403 (Forbidden) or any other Error Page from cPanel.